
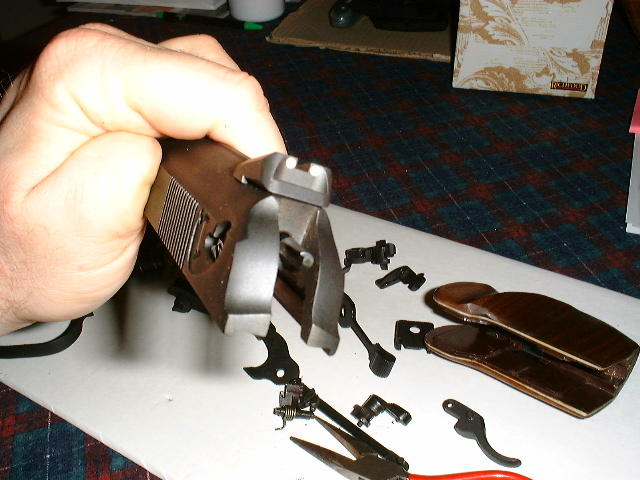
Complete disassembly of the Makarov is helpful or even required for several operations. These include detail cleaning, barrel replacement, refitting of certain parts, and upgrading to the Simson-Suhl safety set.
Just as a new car's oil should be changed soon after putting the first miles on it, so should a new pistol be detail stripped and cleaned after 500-1000 rounds of shooting (i.e. 10-20 boxes of ammo). Metal flakes from the original manufacture as well as flakes from parts that are wearing themselves in properly become suspended in lubricants and work themselves into places where they impede smooth operation.
Barrel replacement also requires complete disassembly. While the reasons may not be immediately obvious, everything up to and including the trigger guard must be removed. The sear and hammer are in the path of the barrel as it is pressed out of the frame. The trigger guard spring rests on the bottom of the barrel, so if you do not remove the trigger guard, reinstalling the spring upon barrel replacement is nearly impossible.
Fortunately, the Makarov has only 27 parts. All of these, with the exception of the barrel, can be removed without specialized tools. The Makarov cleaning rod (available on the order form) with its claw tip and screwdriver tip near the loop is all you'll need. A flat-blade screwdriver, awl, and needle-nosed pliers will also suffice.
Remove the magazine and clear the chamber
Let's start safely and remove the magazine and physically check the chamber for a live round. If you have the magazine in the pistol and it's empty, it should lock back. You can also lock the slide back by pushing up on the slide release and pulling the slide all the way back.
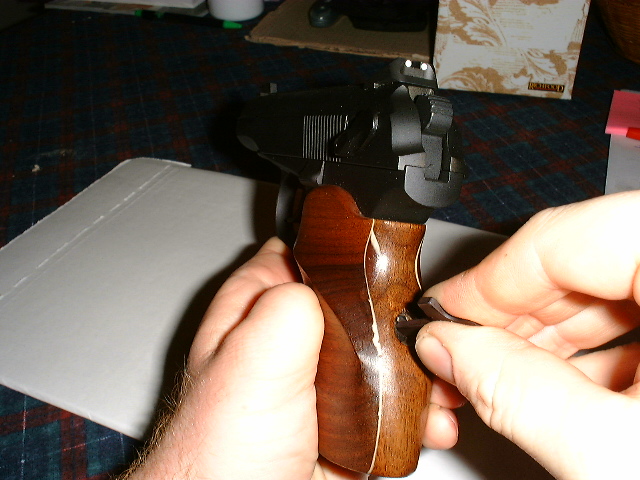
Remove the grip screw and grip
The Makarov grip, irrespective of which version or grip you have, is held in place by a single screw at the rear of the grip. Use the cleaning rod tool on the loop end or a screwdriver to unscrew and remove the grip screw. The grip can now be pulled off towards the rear of the gun. In some cases, it may be very tight, but it will come off backwards.
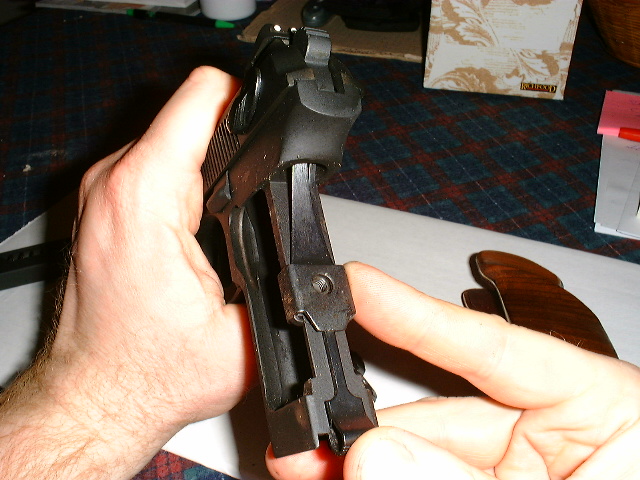
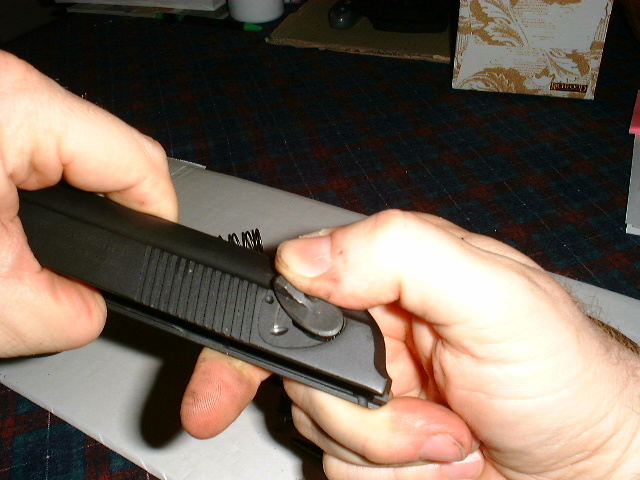
Remove the slide
We received several comments how the slide magically disappeared between the pictures in the next section. Basically, pull down the trigger guard and cock it to one side to keep it down. Cock the hammer, then pull the slide all the way back and pull up and off the rear. The let the recoil spring pull the slide forward and off the barrel.

Remove the main spring retention clip
The clip that holds on the main spring should be pulled down towards the bottom of the frame. This is a bit easier if you decock the pistol and push the magazine release towards the front of the pistol to reduce tension on the spring.
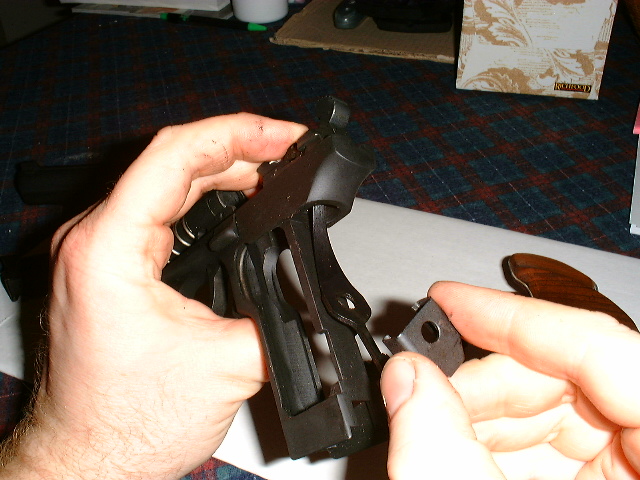
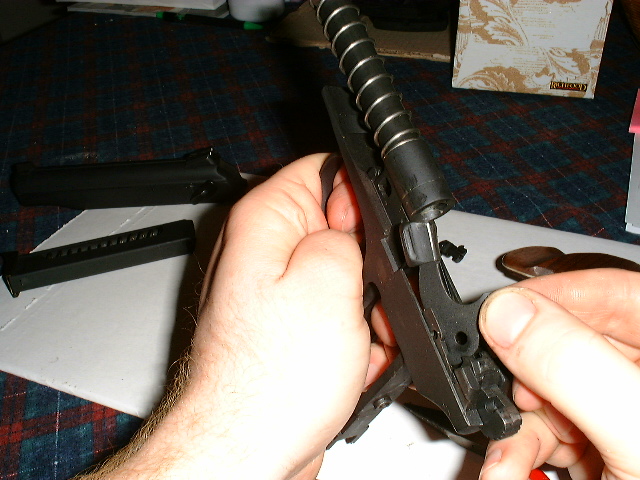
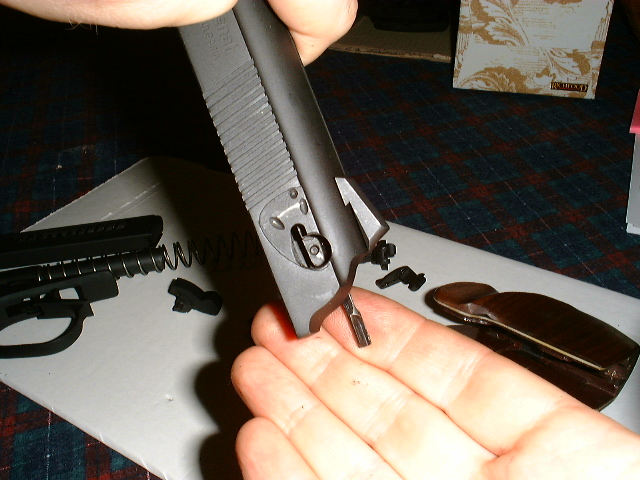
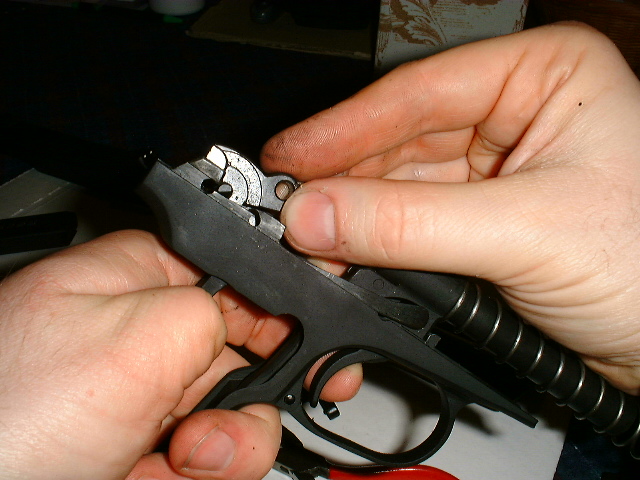
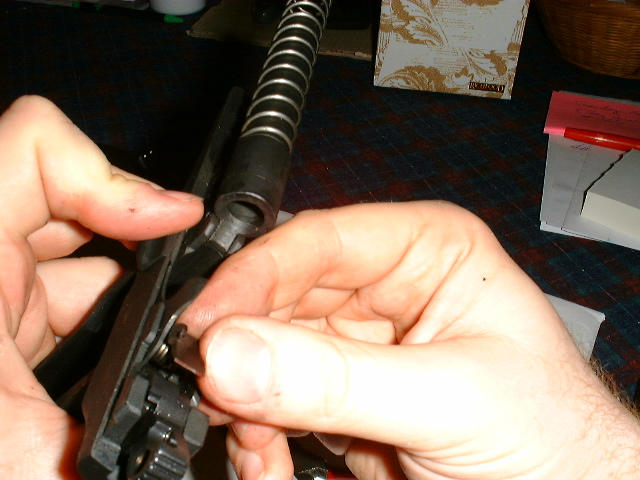
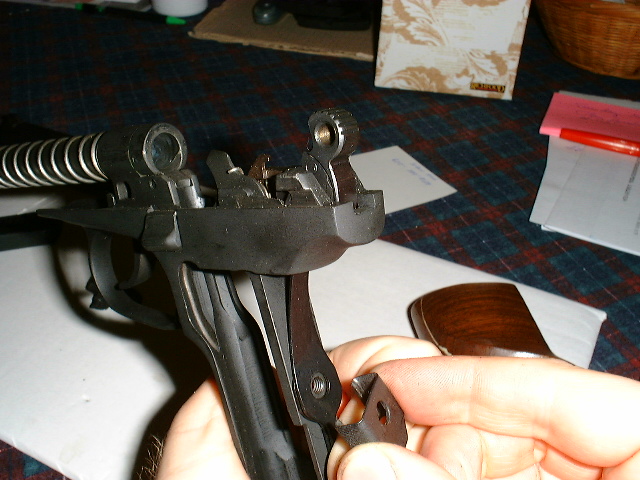
Unhook the sear spring
The sear spring is hooked over the slide release. To release tension on the sear spring, which is wound around the sear, use your cleaning rod claw or a pair of needle nosed pliers to pull the spring over the slide release and release it.
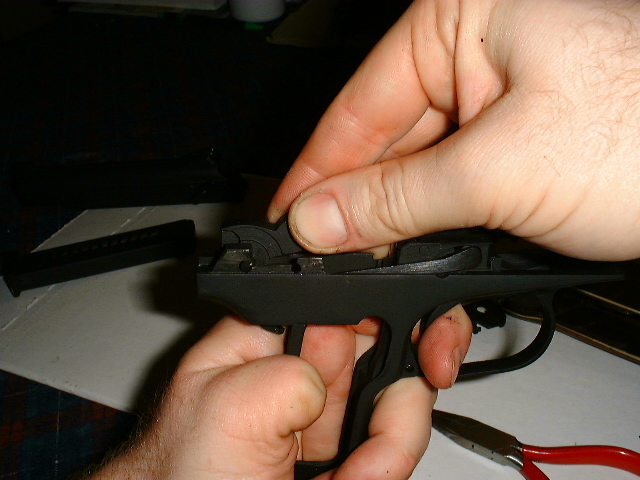
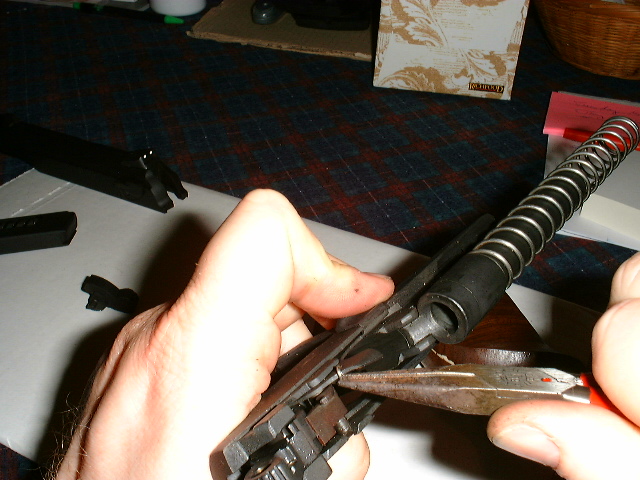
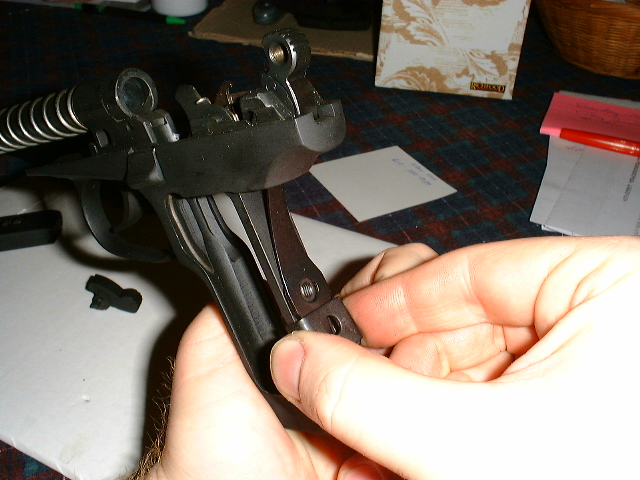
Remove the sear
The sear can now be rotated forward and the right side is pulled out of the frame when the cam lines up with the hole. Some care should be taken not to scratch the slide release with the sear or sear spring since there is not much clearance.
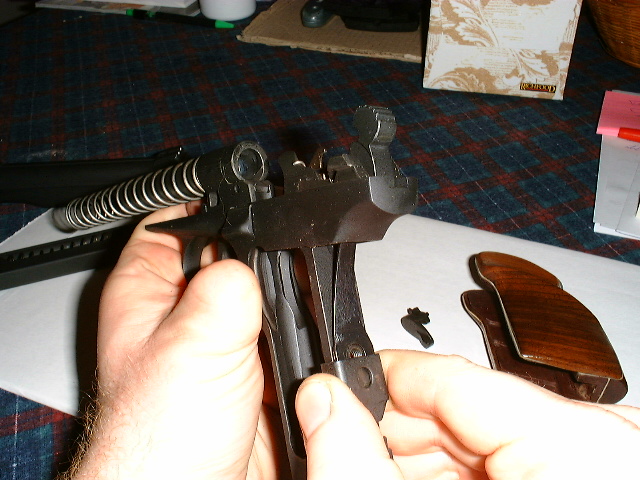
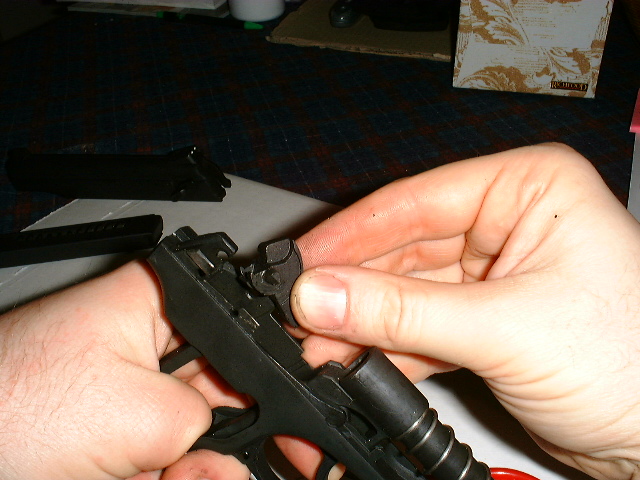
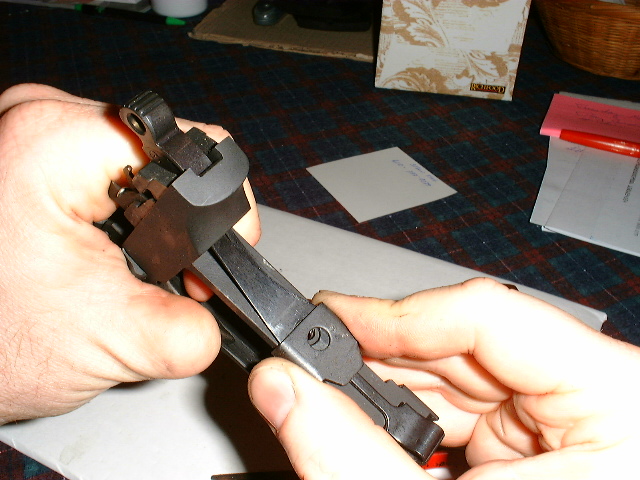
Remove the slide release
Once the sear has been removed, the slide release is free to come out as well. Note its position for later reassembly and pull it out of the frame.
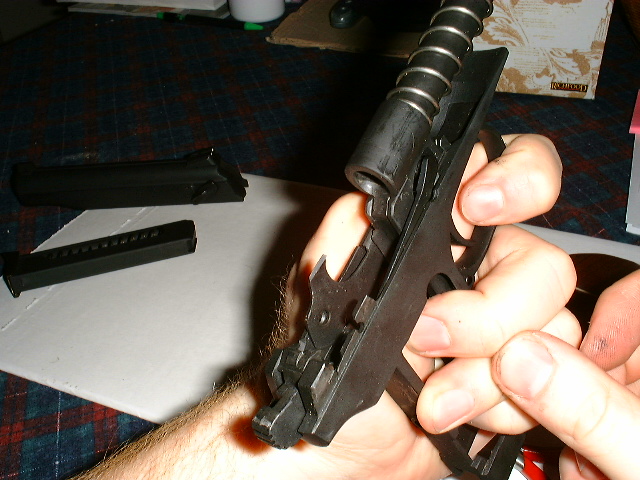
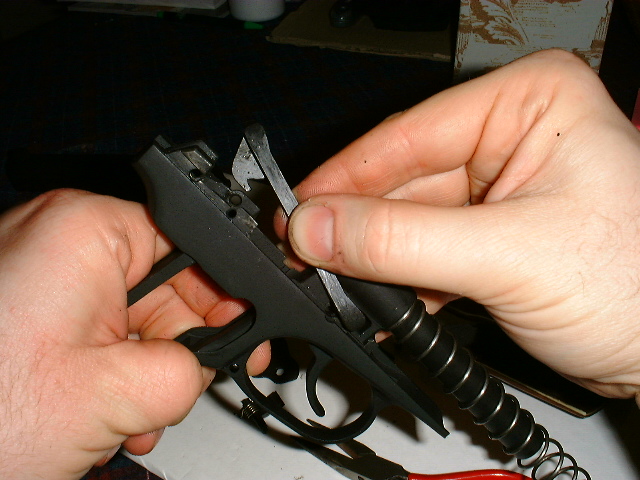
Remove the hammer
The hammer should now be rotated forward and off similar to the sear. It also has a cam on the right side that needs to properly align with the hole in the right side of the frame to be removed.
Remove the trigger bar
The trigger bar with disconnector end will just about fall out once the hammer has been removed. Pull it out of the top of the trigger and remove.
Remove the trigger
Pull down the trigger guard and offset to one side such that it rests against the frame and doesn't rebound back into its normal position. Lift the trigger out of its pivoting position and out.
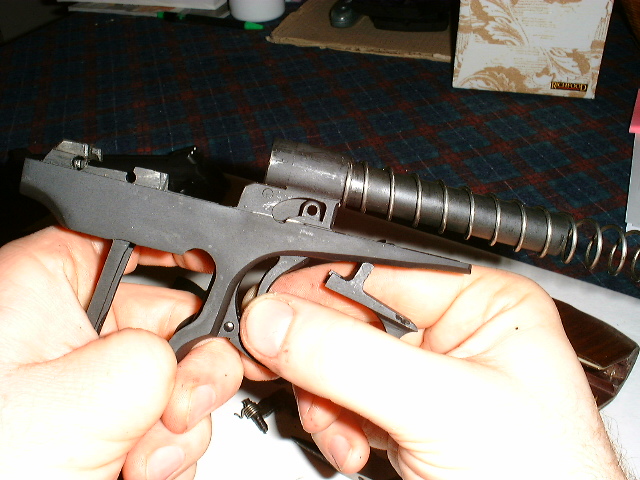

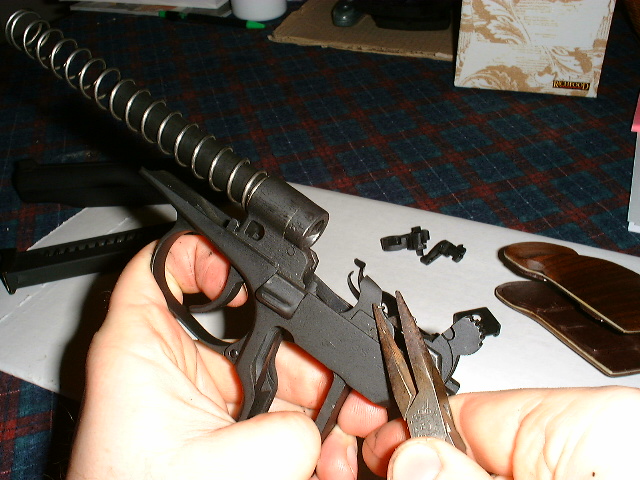
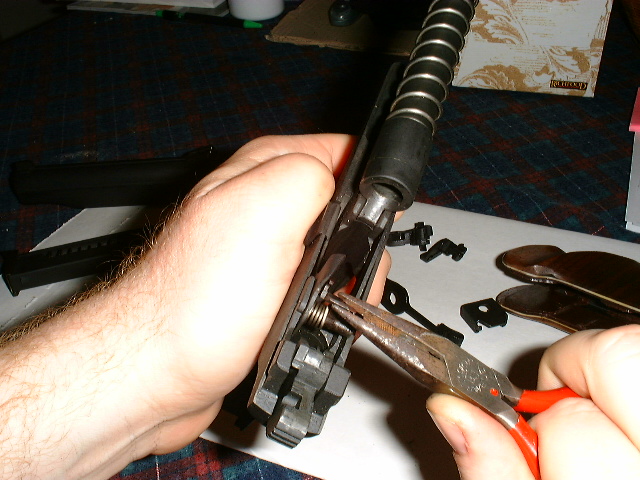
Remove the trigger guard (not shown)
Release the trigger guard into its normal position. Compress the trigger guard spring by squeezing the trigger guard to relieve tension on the pin at the base of the trigger guard. Simultaneously use a punch to drive out the pin. A second pair of hands or a vise lined with a non-marring material makes this much easier. Slowly release the trigger guard and make sure you see where the plunger and spring go.
Remove the recoil spring (not shown)
The order of removing the recoil spring relative to the other parts is not
important. In fact, this can be done simply by field stripping (removing
the slide) and the following: Grasp the pistol frame in your left hand and
the recoil spring from the muzzle end of the pistol with the right hand such
that your thumb and index finger are closes to the frame. Twist
clockwise to "open" the spring and pull backwards off the frame.
The recoil spring has a larger diameter end loop and a smaller diameter end
loop. The smaller diameter end is slipped on to the barrel first.
This allows it to stay in place when field stripping. To replace, slip the
smaller diameter end over the muzzle and twist the spring clockwise to "open"
the spring such that it slips over the barrel easily.
STOP!
This is as far as you need to go on the frame unless you plan to change the barrel, which is discussed here.
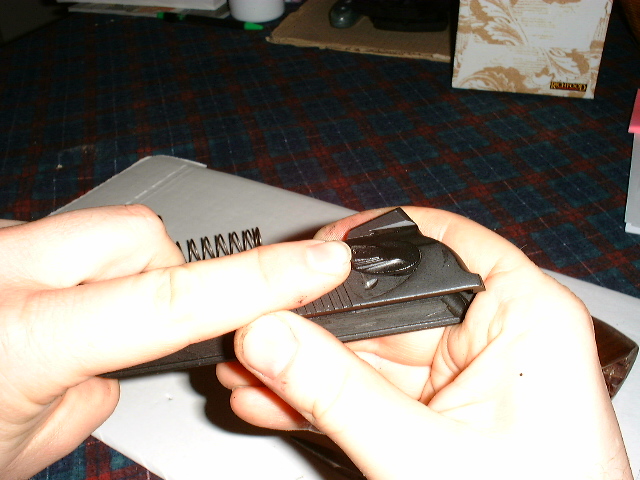
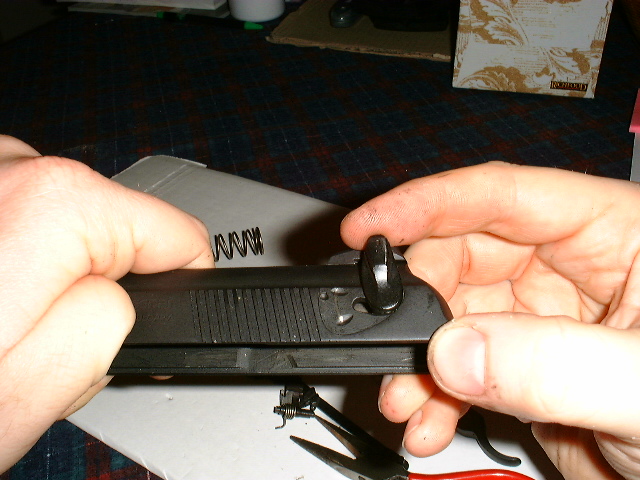
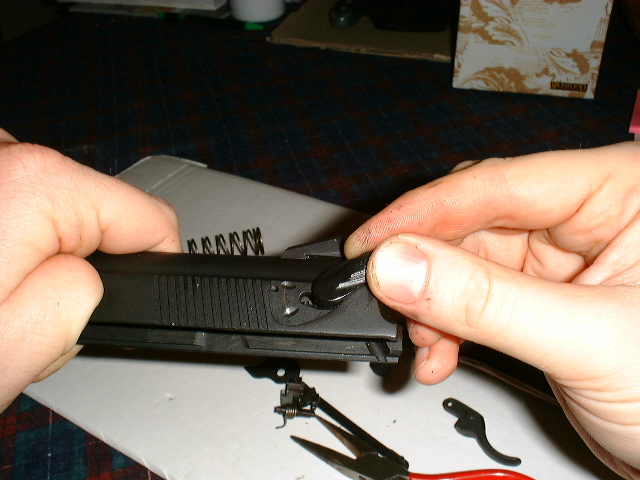
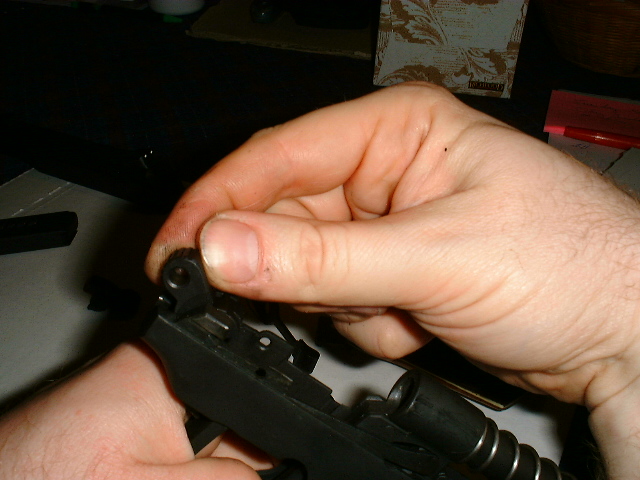
Remove the safety
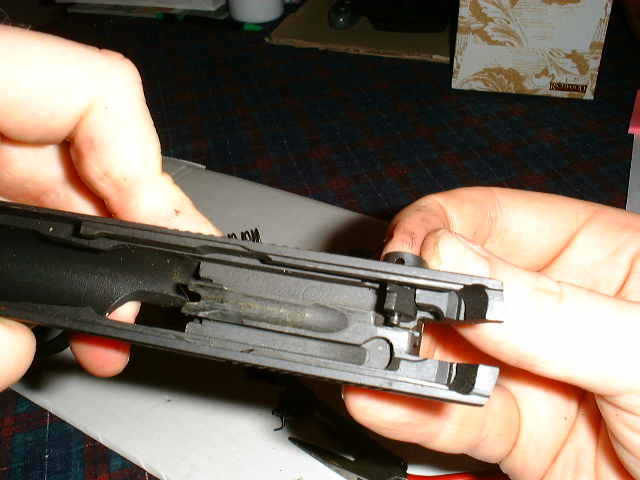
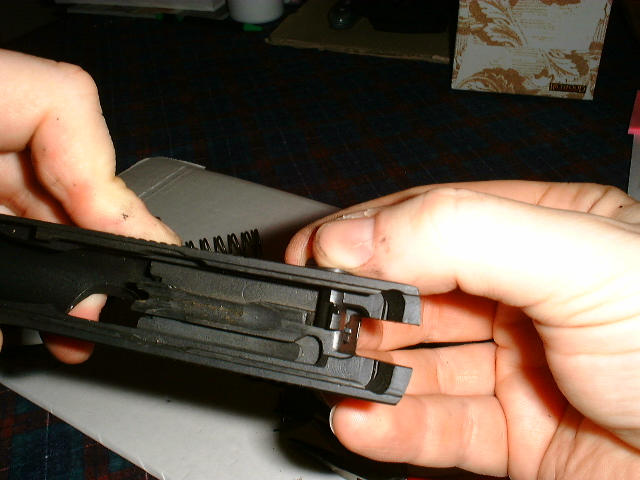
Remove the slide from the frame if it has not already been done. Rotate the safety to the "safe" position (up), then push the bottom of the safety lever to continue rotating clockwise until the safety detent spring clears the detent under the "safe" setting. On some pistols, this may take considerable force. Once it has cleared, the safety should easily rotate such that it makes an approximately 120� angle with the muzzle. It can now be removed from the slide. Note the position of the peg on the end of the inside of the safety and how it inserts into the frame.
Remove the firing pin
The safety holds the firing pin in place. Once the safety has been removed, the firing pin can and will easily fall out. Before you tip it out, not the position of the notch at the rear of the firing pin. The quarter-circle cutout should be on the lower left if you hold the slide as if to line up the sights.
STOP!
This is as far as you need to go on the slide unless you want to remove the rear sight or the extractor assembly. The dovetailed rear sight on all but the Russian adjustable sight guns can just be tapped out with a non-marring punch. You're done with the slide unless you want to remove the extractor assembly, which is covered on the main tech info page.
Much of the reassembly can be summed up by the statement "refitting is the reverse of removal," but there are some tricks. Some pictures of disassembly have been reused at the appropriate point.
Replace the firing pin and safety
Before inserting the firing pin, take a look into the firing pin hole with a light to make sure it's not obstructed with crud. If it is, try using a cotton swab with one head broken off to push stuff out. Resist temptation to squirt too much lubricant into the hole since gobs of oil will attract and trap dirt. Similarly, clean and lightly lubricate the firing pin.
Insert the firing pin with the sharp tip first and such that the quarter-circle cutout at the rear is on the lower left if you hold the slide as if to look at the sights while aiming. Insert until the pin is flush with the firing pin hole.
Taking care not to tip the firing pin back out, insert the safety back into the frame. It only goes in one way, but make sure that the rotating pin that's part of the safety is properly inserted back into the hole in the frame. Now rotate the safety counterclockwise and back into the "safe" position. Considerable force might be required to get the safety rotated back into place and the detent spring will most likely mar the slide slightly. This is normal and typically cannot be helped.
STOP!
You're done with the slide unless you took the extractor assembly out, which is covered on the main tech info page.
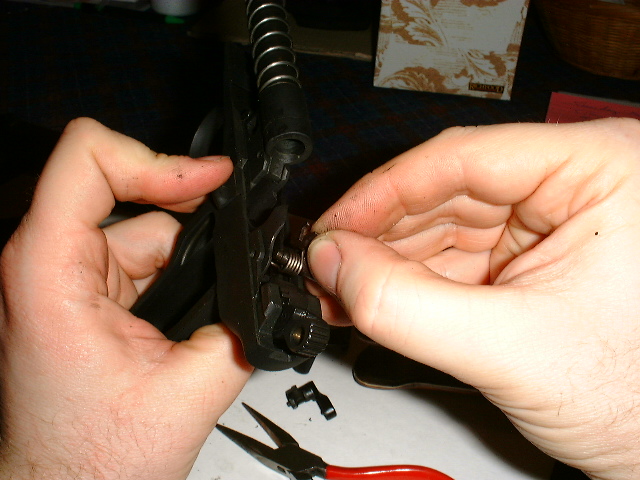
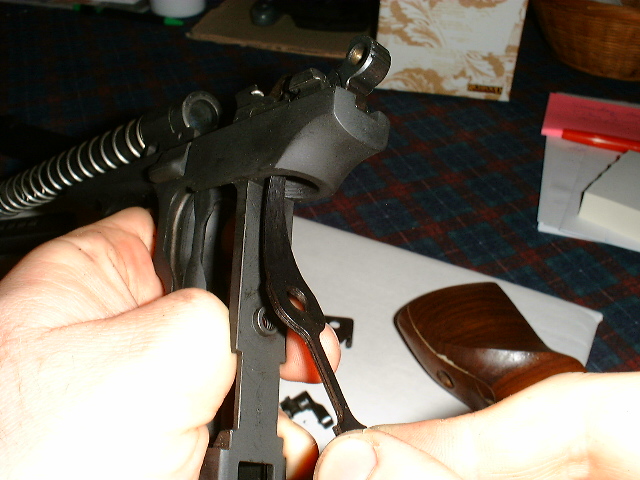
Refit the trigger guard (not shown)
This is perhaps one of the trickiest procedures of Makarov reassembly. Unfortunately, we did not take pictures of this on our first session.
Hold the pistol upside-down and insert the spring and plunger into the hole in that order and such that the small protrustion on the plunger is towards the spring. Compress the plunger/spring combination with the trigger guard and hold it into place such that the holes on the trigger guard and frame align. This can be difficult because the spring is relatively strong. A padded vise or a helper might help with this portion. Then insert the pin, which is shaped like a dumbell, and drive it into place with a small hammer and punch.
Refit the trigger
Pull down the trigger guard and offset to one side such that it rests against the frame and doesn't rebound back into its normal position. Insert the trigger up into the frame into its resting place such that it pivots smoothly. The hole that mates with the trigger bar should be visible through the side of the frame.
Refit the trigger bar
Insert the trigger bar into the trigger and place the disconnector end inside the right side of the frame. Do not concern yourself with the position of the disconnector at this time. It will tend to dangle down due to gravity. You will eventually have to move it such that it's pointing up, but it is nearly impossible to keep it that way while installing the hammer and sear.
Refit the hammer
Hold the hammer as shown and insert it into its holes near the rear of the frame. Then rotate backwards to the cocked position.
Refit the slide release
This just drops right into place. Note that the hole in the slide release needs to line up with the hole on the side of the frame. The sear will insert through both of these in the next step and hold the slide release in place.

Refit the sear
Position the sear such that the "sharp" contact surface that goes agains the hammer face is pointing up or slightly forward. Insert the left pin (the side with the sear spring hook) through the slide release and into the frame hole. Insert the right pin, which is cammed, into the hole on the right. Some jiggling and repositioning may be required to get the sear to insert properly.
While holding the slide release to keep it from rotating, rotate the sear backwards into position. Take care to minimize scraping damage to the slide release.
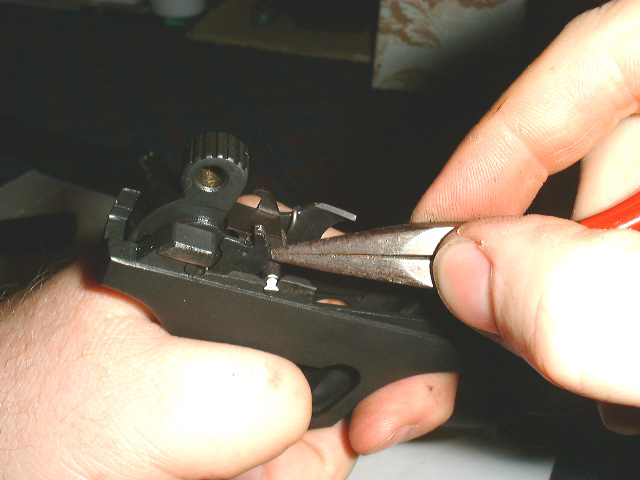
Hook the sear spring
The sear spring must be hooked over the slide release. Use the cleaning rod claw tool or a pair of needle-nosed pliers to place the hook end of the sear spring over the slide release. The sear should now be properly tensioned against the hammer.

Position the disconnector
The disconnector end of the trigger bar should be positioned as shown against the right side of the sear. If the pistolw as held upright during assembly of the hammer and sear, the disconnector will most likely be dangling down. Turn the pistol upside down and work the trigger until the disconnector dangles down while the pistol is upside-down. Attempt to engage it on the sear and put slight pressure on the trigger so it stays there. Turn the pistol back right-side-up.
Refit the main spring
Decock the hammer to reduce tension on the spring when installing. This may require manually lifting the sear. Insert the main spring such that the sharp end goes up under the hammer. Align the hole in the main spring with the grip screw hole in the back of the frame. The spring will already be under tension at this point and will require force to keep it there.
Refit the main spring retention clip
While holding the main spring as shown above, slip the main spring clip back onto the frame. Make sure the hole in the clip aligns with the holes in the main spring and the grip screw hole in the frame.
At this point, test the single and double-action functions of the pistol to make sure that all parts have been replaced correctly. If the pistol does not function correctly, the most likely culprits are the disconnector/trigger bar placement and main spring placement.
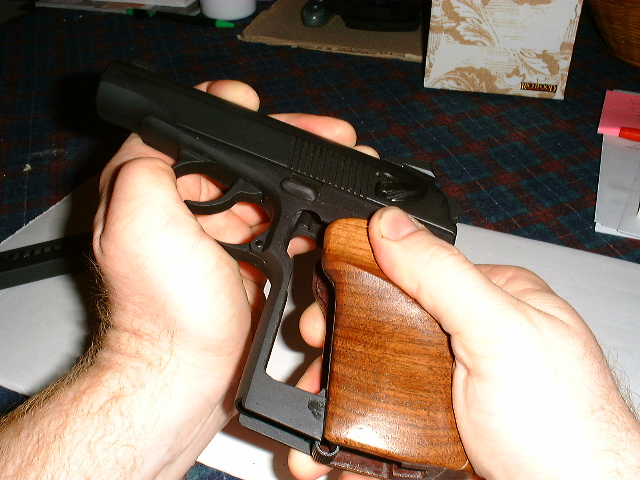
Refit the grip and screw
Slide your grip back on from the rear and make sure the grip screw hole aligns with the threaded hole in the frame. The Makawrap grip works slightly differently, of course, but the holes must still align.
Tighten the grip screw, taking care that it does not protrude into the magazine well. Do not overtorque the screw, particularly with wooden grips.
Refit the slide onto the frame
Assuming you have not removed the recoil spring, refit the slide just you would after field stripping: Pull down the trigger guard and offset to one side such that it rests against the frame and doesn't rebound back into its normal position. Pull the hammer back to its cocked position. Push the barrel through the muzzle opening in the slide, then pull the slide all the way back and down onto its rail on the frame while compressing the recoil spring with the slide. The recoil spring should now push the slide forward into battery. Push the trigger guard back into its normal position. Slide removal is shown below, which is the reverse of refitting.

STOP! You're done!