

Priming System
9x18 Makarov cases from Starline and trimmed 9mm Parabellum cases both use
small pistol primers. Set your priming system to accept small pistol primers and use the
case holder for 9x18 Makarov cases. If priming is an integral step in your reloading press,
refer to your reloading press manual for changing from large to small pistol primers. This
may require you to change the shell holder at the same time.
Die Mounting System
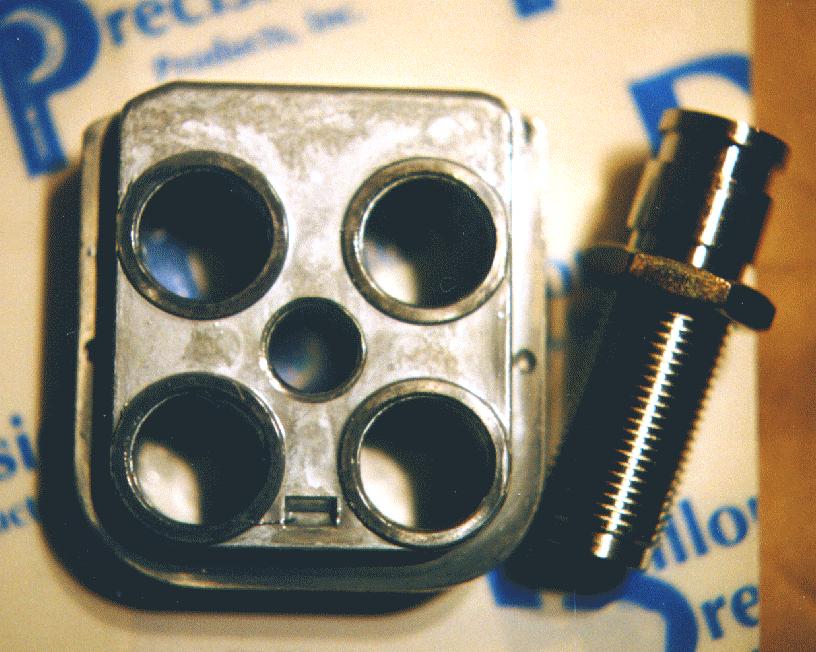
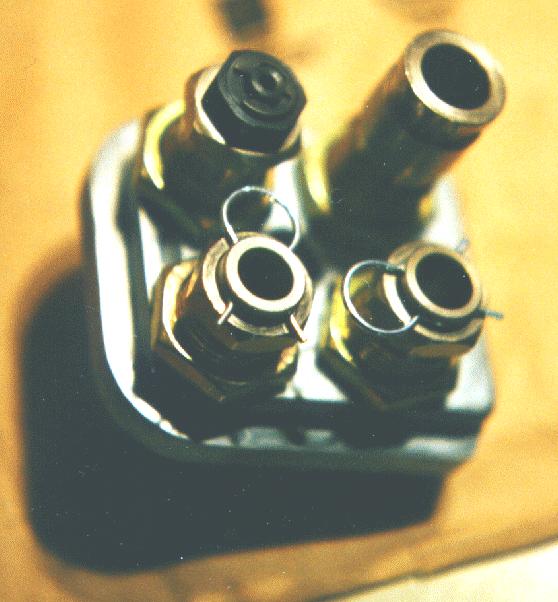
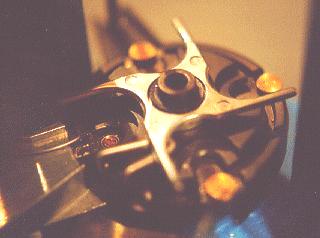
Some progressive reloading presses, such as the Dillon RL 550, have a
removable toolhead
[with powder charge die (picture)]
[with dies installed (picture)]
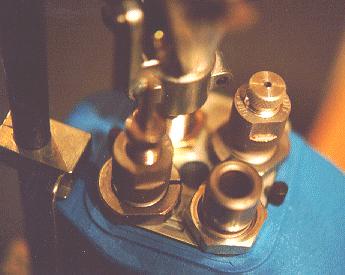
[with dies in Dillon press (picture)]
that allow calibers to be changed quickly without removing the dies. This has the
tremendous advantage that your die settings need never change when loading different
calibers. These quick-release toolheads are ridiculously cheap, and are great time savers.
Powder Charging System
Single stage reloading press users will probably use whatever system has worked
previously. Typically, this involves a scale, a powder dipper, or a powder thrower. If you
are unfamiliar with powder charging systems, please refer to a reloading manual.
Progressive reloading presses typically use a single stage for case belling and
charging the case with powder. For example, on the Dillon RL 550, the die in the
belling/charging station remains the same for all calibers, but the
belling insert (supplied in
the caliber conversion kit (picture)) must be changed.
A better solution for the RL 550 is to
purchase a
new die insert (picture) for each new caliber and
leave them mounted along with your
other dies in the die mounting system, as described previously.
Some progressive loaders with quick-change die mounting systems also offer
additional powder charging systems for sale. I find these to be a waste of money, since
the powder hopper assembly can be quickly and easily removed and reinstalled.
Shell Holder Installation
If you do not currently have the 9x18 Makarov shell holders installed, you must
change your shell holders.
Single stage press users have things a bit easier in this step. The shell holder is
usually held in place by a single hex screw. Unscrew this to loosen the hold on the old
shell holder. Slide out the old shell holder and replace it with the one for the 9x18
Makarov cases. Tighten the hex screw to keep the holder in place.
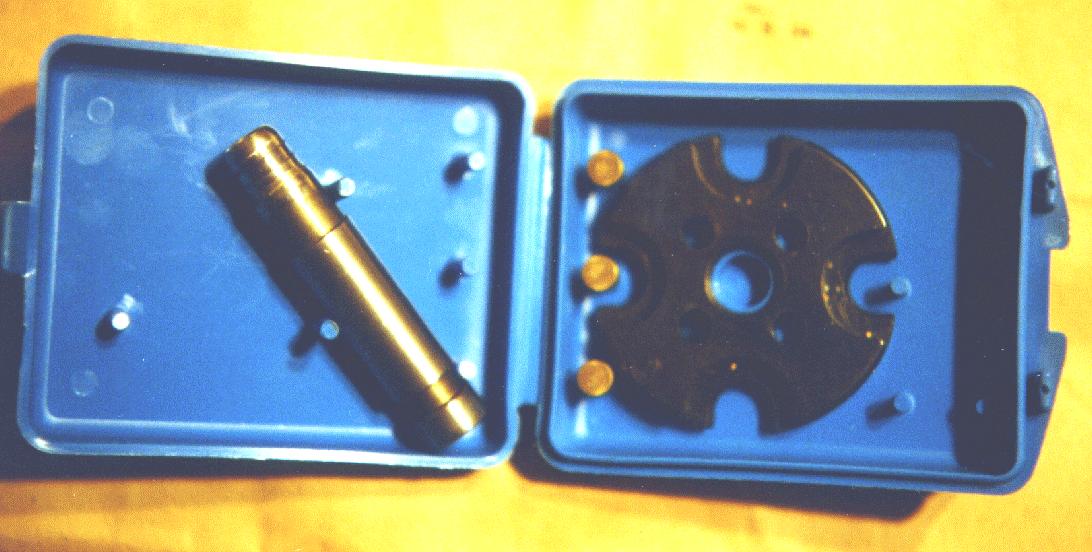
Progressive press users must typically loosen several screws to remove the
shellholder (picture). Take the new shell holder from the
caliber conversion kit (picture)
and install as prescribed
by your reloading press manual. You may have to make minor adjustments to the priming
system if priming is done on the down-stroke of station one (case resizing) so that the
priming cup fits properly into the shell holder.
Installation and Adjustment of the Resizing Die
If you are reloading on a progressive reloading press that uses removable
toolheads, remove the powder charge system, remove any existing toolhead, and store the
toolhead. Keep the powder charge system handy; we will need it soon. Install the empty
toolhead.
Take the resizing/decapping die from its box and begin screwing it into your
reloading press. On progressive reloading presses, it goes into station 1. Place an empty
case into the station 1 shell holder and operate the lever, thereby raising the shell plate to
its top position. Continue to screw the die until you encounter resistance from the case.
Return the lever to its up position, lowering the shell plate. Screw the die down a few
more turns. Operate the lever, and make sure that the shell plate does not touch the die.
Continue to screw the die down a few turns at a time and operate the lever, always
checking that the shell plate does not touch the die. When you are finished, you should
barely be able to see the case when the shell plate is at its top position.
If you begin to encounter excessive resistance to operating the lever, you should
also stop screwing the die down; you may be trying to resize the case head. As long as
you are getting a full case resizing action, the die is adjusted correctly. A small amount of
case lubricant is a good idea, particularly when using new dies. Carbine die manufacturers
will boast that this is not necessary. However, a spray type case lubricant can quickly
make the cases a bit slicker and resize with less effort.
If necessary, adjust the decapping pin so that it removes the primer from spent
cases. Never attempt to remove a live primer with the decapping/resizing die.
If you use die locking rings, especially on single stage presses, do not forget to
tighten the locking ring screw once the dies are properly adjusted. This will save you the
hassle of readjusting the die the next time you use it.
Priming the Case
Since you are setting up the press for the first time, I highly recommend that you
do not use live primers. Prime a few cases with spent primers until everything is adjusted,
or simply leave the cases unprimed.
Do not charge your cases with powder until you have set up all dies, have
calibrated the powder thrower by weighing a few charges, and are ready to reload. Some
reloading presses, such as the Dillon RL 550, automatically charge the case when the
belling operation is performed. If it is not practical for you to empty the powder hopper,
use fired cases. Remember to return the powder to the hopper after every pull of the
handle.
Installation and Adjustment of the Belling Die
Depending on which type of reloading press and which type of powder charge
system you use, the belling die adjustment will be different.
The goal with belling is to give the bullet the necessary clearance to enter the case
without scraping the bullet on the case mouth. The bullet seating die, which is discussed
in the next section, will accomplish the task of pushing the bullet into the case to the
proper depth. If the bullet is allowed to fall freely into the case or is seated too deeply, a
dangerous over-pressure situation can occur that may cause your firearms to rupture,
causing severe injury. In addition, even mild over-belling will fatigue the case metal and
cause early case failure. If the bullet drops in freely before the belling operation, the case
was probably not resized correctly.
Single stage reloading press users or those with an external powder charge systems
should use the belling die in the die set that you purchased. Insert the belling die into the
threads of your reloading press (stage 2 for progressive reloading presses). Insert an
empty, resized, and unprimed case in the shell plate and operate the handle to lift the shell
plate to its highest point. Continue to screw the belling die down until you feel it touch
the case. Lower the shell plate with the handle. Screw the belling die down 1/4 turn.
Operate the handle, inspect the case, and try to place a bullet in the mouth of the case. If
the base of the bullet will not enter the case easily, screw the belling die down 1/4 turn, and
operate the handle again. Continue this process until the bullet base barely clears the case
mouth. If the bullet drops too far into the case, use a new case (or resize the current case)
and back the die off; start over until you have a proper fit for the bullet.
Progressive reloading press users with an integral belling/powder charging die
should use the generic powder charge dies made for the reloading press (see Powder
Charging System). Again, I recommend purchasing one of these powder charge dies for
each caliber to avoid having to unscrew powder charge dies from pre-adjusted toolheads.
Remove the belling insert for the 9x18 Makarov from the caliber change kit and drop it
into the powder charge die. If you have a 9 mm Parabellum caliber change kit, the belling
insert works reasonably well for the 9x18 Makarov. Note that your powder die
adjustment will be different if you change from the 9 mm Parabellum belling insert to the
9x18 Makarov. Attach the powder charge system to the belling die, but leave the screws
loose enough that the belling die may be rotated while holding the powder charge system
in place. The reason for attaching this now is that the powder charge system prevents the
belling insert from traveling upwards during the lever stroke.
Insert an empty, resized, and unprimed case into the shell plate under the belling
die, and operate the handle to lift the shell plate to its highest point. While holding the
powder charge system in place, rotate the belling die until you feel resistance from the
case. Lower the shell plate with the handle. Screw the belling die down 1/4 turn. Operate
the handle, inspect the case, and try to place a bullet in the mouth of the case. If the base
of the bullet will not enter the case easily, screw the belling die down 1/4 turn, and operate
the handle again. Continue this process until the bullet base barely clears the case mouth.
Adjustment of the Bullet Seating Die
Normally, the case would be charged with powder before inserting and seating the
bullet. However, the first time you set up the press, use an unprimed or fired dummy case.
If you use a progressive press that automatically dispenses powder in the belling stage, be
sure to return the powder to the powder hopper before seating the bullet in the dummy
case.
Some reloading die sets have a combination bullet seating/crimping die (3-die
sets). Others have a separate bullet seating and a crimping die (4-die sets). If you have
not purchased your die set already, I highly recommend the 4-die system.
In the 3-die system, maintaining the proper bullet seating adjustment while setting
the crimping function of the bullet seating/crimping die is tricky, and typically wastes
several dummy cases and bullets before the setting is correct. Since the bullet seating stem
must be adjusted before using each new bullet type, the whole process is tedious and
wasteful. In this section, I will discuss only the bullet seating function of the bullet
seating/crimping die.
If you already have a 3-die set, do not throw it out just yet. You can purchase a
separate taper crimp die from many reloading stores and catalogs. If a 9x18 Makarov
crimp die is not available, the 9mm Parabellum die will work very nicely.
Combination Bullet Seating/Crimping Dies
Insert an empty case (without a bullet) into the shell plate under the bullet seating
die station, and operate the reloading press lever so that the shell plate is in its highest
position.
Insert the bullet seating/crimping die into the threads of your reloading press (stage
3 for progressive reloading presses). Be sure the bullet seating stem in the seating die is
retracted nearly all the way. Screw the die into the reloading press until you feel it
touching the case. Unscrew the die 1/4 turn. Lower the shell plate, carefully insert a bullet
into the case mouth so that its tip points straight up, and raise the shell plate. Screw the
bullet seating stem down until you feel it touching the bullet.
Lower the shell plate, adjust the bullet seating stem 1/4 - 1/2 turn at a time, and raise
shell plate. Inspect the dummy cartridge visually and with a micrometer to check the
bullet seating depth. Repeat the die adjustment and lever operation until the bullet is
seated to the proper depth. As the cartridge approaches the desired overall length, adjust
the seating stem slowly; once you have pushed the bullet into the case you must use a
bullet puller to remove it. Most reloading data specifies the cartridge overall length, i.e.
the distance from the base of the cartridge to the tip of the bullet. For the 9x18 Makarov,
this distance is typically around 24.0 - 24.5 mm.
Bullet Seating-Only Dies
Insert an empty case with a bullet into the shell plate under the bullet seating die
station, and operate the reloading press lever so that the shell plate is in its highest
position.
Insert the bullet seating die into the threads of your reloading press (stage 3 for
progressive reloading presses). Screw the die into the reloading press until you feel it
touching the bullet. Lower the shell plate, adjust the bullet seating die 1/4 - 1/2 turn at a
time, and raise shell plate. Inspect the dummy cartridge visually and with a micrometer to
check the bullet seating depth. Repeat the die adjustment and lever operation until the
bullet is seated to the proper depth.
Adjustment of the Crimping Die
Crimping ensures that the cartridge enters the pistol's chamber easily, and that the
bullet is held in the cartridge mouth snugly. Since the Makarov is a straight-walled
cartridge, rather than a tapered cartridge, a proper crimp is particularly important.
Combination Bullet Seating/Crimping Dies
Insert the dummy cartridge with a properly seated bullet into the shell plate (stage
3 for progressive reloading presses). While holding the bullet seating stem stationary
relative to the reloading press, rotate the die clockwise 1/4 turn. Operate the lever to raise
the shell plate to its highest point, then lower the shell plate. Inspect the crimp. The
mouth of the case should be parallel with the rest of the case or tapered slightly into the
bullet. If the die has not touched the case or made enough of a crimp, repeat the
adjustment and lever action.
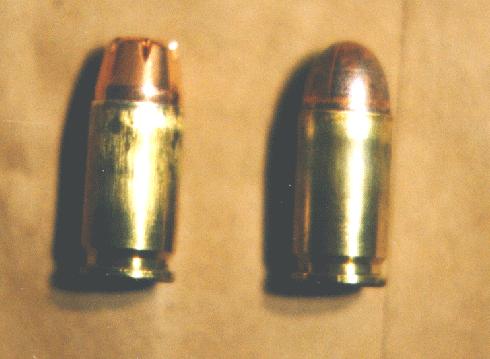
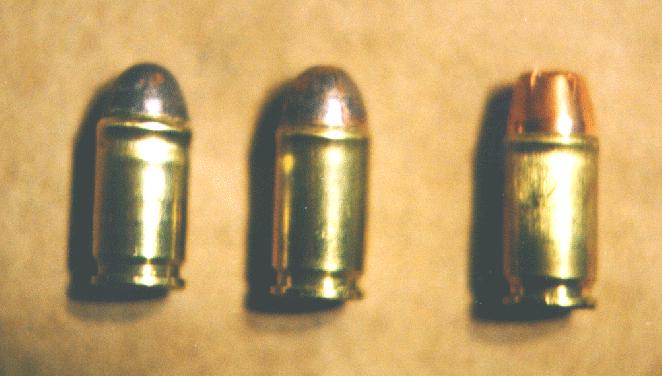
Example of good crimp (picture)
Over-crimping with this type of die may cause a bulge near the case mouth, which
will impair proper chambering in the pistol (see inset picture). In addition, the bullet may
be held tightly in the case if too much crimp is applied. This can create an unsafe over-
pressure problem.
Example of overcrimping (picture)
Crimping-Only Dies
Insert the dummy cartridge with a properly seated bullet into the shell plate (under
the threads where the crimp die will be inserted). Operate the lever to raise the shell plate
to its highest point.
Insert the crimping die into the threads of your reloading press (stage 4 for
progressive reloading presses). Rotate the die clockwise until the you feel resistance from
the cartridge. Lower the shell plate. Rotate the die clockwise 1/4 turn. Operate the lever
to raise the shell plate to its highest point, then lower the shell plate. Inspect the crimp.
The mouth of the case should be parallel with the rest of the case or tapered slightly into
the bullet. If the die has not touched the case or made enough of a crimp, repeat the
adjustment and lever action.
This type of die will typically not cause a bulge near the case like a combination
bullet seating/crimping die. However, the bullet may be held tightly in the case if too
much crimp is applied. This can still create an unsafe over-pressure problem.
Checking the Adjustments on Progressive Reloading Presses
Before you begin cranking out rounds on a progressive reloading press, check
your die adjustments one last time. Use an empty unprimed case to run through all the
stations. If your reloading press automatically dispenses powder, use a fired case with a
spent primer or prime the case with a spent primer to avoid spilling powder through the
flash hole, and be sure to return the powder back to the hopper before seating the bullet.
When you have assembled the dummy cartridge, double-check the overall length and
crimp.
At this point, you need only calibrate your powder charger and you'll be ready to
start crafting some test rounds for your Makarov.
Adjusting the Reloading Press for New Loads
After you have made a few rounds of your first reloaded cartridge, you will
probably want to try a different combination of powder charges, powder types, bullet
seating, and bullet type. Each of these requires some adjustment of the reloading press,
powder charge system, or both. The resizing, belling and crimping adjustment should not
change, unless you have trouble seating a new type of bullet.
Adjustment of the Bullet Seating Die
When reloading with a different bullet type or size, the bullet seating die must
typically be adjusted. As with the initial adjustment, this operation is much easier with a
4-die system that uses a separate bullet seating and crimping die.
Combination Bullet Seating/Crimping Dies
Rotate the whole die counterclockwise one or two full turns, depending on how
different the shape of the new bullet is from the old bullet. Remember how many turns
you rotated the die. Insert a dummy resized and belled case in the shell plate under the
bullet seating/crimping die. Place a bullet in the case and operate the lever so that the shell
plate reaches its highest position and returns to its lowest position. Adjust the seating
stem clockwise in 1/4-turn increments until the bullet is seated to the proper depth. While
holding the seating stem stationary relative to the reloading press, rotate the die clockwise
the same number of turns it was originally rotated counterclockwise. You may have to
readjust the crimping function slightly to achieve a good crimp.
You cannot simply adjust the seating stem, because the combination die will crimp
the case every time.
Bullet Seating-Only Dies
Rotate the die counterclockwise one or two full turns, depending on how different
the shape of the new bullet is from the old bullet. Insert an empty case with a bullet into
the shell plate under the bullet seating die station, and operate the reloading press lever so
that the shell plate is in its highest position, and return the shell plate to its lowest position.
Rotate the bullet seating die clockwise in 1/4-turn increments until the bullet is seated to the
proper depth.
Adjustment of the Powder Charge
Since each reloading press and powder charging system is different, refer to the
manuals for your system for details on changing the powder throw.
When using the same brand and type of powder as the previous load, select your
load and make sure it does not exceed the maximum recommended load for that powder
type. Adjust your powder thrower, throw 3 or 4 charges and return them to the hopper,
and then weigh the next 3 or 4 charges. Once you have begun reloading, recalibrate your
powder thrower every 15-25 cartridges.
When changing to a new powder brand or type, be sure that all of the old powder
has been used or discarded from the hopper. Do not mix powders or return unused
powder to the original container. Discard unused powder in flower beds (plants love it).
Pour the new powder into the powder hopper so that there is enough for the rounds you
intend to load with this powder. Again, adjust your powder thrower, throw 3 or 4 charges
and return them to the hopper, and then weigh the next 3 or 4 charges. Once you have
begun reloading, recalibrate your powder thrower every 15-25 cartridges.